Customizing Tilt Brush
Part One — Introduction and Custom Brushes
Introduction to this series
On the 27th January 2021, Google announced that it would discontinue internal development on Tilt Brush and made the project open-source on GitHub.
While it’s sad to see Tilt Brush join the Google Graveyard, it’s also a very exciting time! Tilt Brush is built in Unity, which is a free and extremely popular game engine. That means that it is now possible to customize Tilt Brush in a way not usually popular with creative applications, opening the door to a Cambrian Explosion of customized Tilt Brush builds — the medium of VR creativity itself can now become a creative medium!
Like many people who use Tilt Brush, I’ve often been able to dream of more features than the Tilt Brush team were able to build into the app. But now that Tilt Brush is open-sourced, I intend on diving into the project and adding a variety of customizations and new features. As I do so, I’ll release a series of writeups explaining how the project is structured and how to go about making your own customizations!
Getting Started
You’ll need a few things to get started customizing Tilt Brush. I’m going to assume you already have a system capable of actually running Tilt Brush, so this is just what you’ll need on top of that.
You’ll need Unity 2018.4 — I’m using 2018.4.16f1 and that seems to be working fine. You don’t need to be a Unity expert to follow along with these tutorials, but you’ll need a basic understanding of how to navigate project folders, how to modify object settings in the inspector, how to add, move and manipulate assets, and a general understanding of how Unity ‘works’.
If you’ve never touched Unity before, I suggest taking a few hours to complete the classic ‘Roll a Ball’ tutorial to get yourself familiar with the absolute basics.
You’ll also need some kind of image editor to do things like create custom icons and textures. Photoshop, Illustrator, GIMP — up to you! Just make sure you can output precisely-sized images with alpha channels.
To actually get the Tilt Brush project, you’ll need to get it from its GitHub repository — https://github.com/googlevr/tilt-brush. From here, you have two options.
- By far the best option is to properly clone the repository. To do this you’ll need a basic understanding of how to use git, which is the verision-control system that GitHub is built on. An overview of git is outside the scope of this tutorial, but if you want to get stuck in, GitHub has a decent getting-started tutorial on their website.
- If you don’t want to mess with Git just yet, you can manually download the repository instead. Click the green ‘Code’ button and then click ‘Download Zip’. This is the full Unity Project which, once extracted, can be opened in Unity Hub!
Once you open the Project in Unity, you may be presented with Unity telling you that the project was built with an older version of Unity. So long as you’re using *a* version of 2018.4, you can just click ‘upgrade’. You may also see a popup window asking you to import “TMP Essentials” — you’ll need to do this, so go ahead (but don’t worry about doing anything else in that window)
Oh, one other thing — if you see this window popup, click Ignore All!

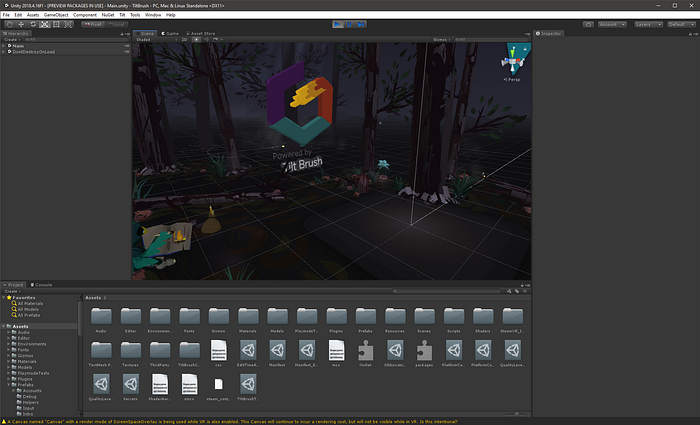
If you’ve done everything right, you should now have Tilt Brush open within Unity, ready for modifying. Navigate to the Assets/Scenes folder and double click on ‘Main’ to open the main scene.
Press the play button at the top-center of the screen to run Tilt Brush for yourself!
Custom Brushes
Adding custom brushes is extremely easy — it takes all of five minutes and doesn’t require any programming at all! I’ve tried to be extra-thorough here, but if you know your way around Unity, you should be able to get by just reading the captions under each image.
All the brushes in Tilt Brush are contained inside the Assets/Resources/Brushes/Basic folder. If you take a look, you’ll notice that each brush has its own folder named in CapitalCase (so no spaces, and each word begins with a capital letter).
Let’s create a new brush by adding a new folder! I’ll call mine Check.

If you take a look at what’s inside some of the other folders, you’ll notice that they all have, at the very least:
- A buttonimage.png, so that they can appear on the brushes panel in-game
- A material with a name that matches the brush name
- An object with a unity cube icon — this is the “brush descriptor” and defines how the brush behaves
Some brushes also have textures, shaders, prefabs, and other assets — brushes can be arbitrarily complex! For now, we’ll stick to these three basic files plus some custom textures.
So first, let’s create the buttonimage.png — this needs to be a 128x128 black-and-white png image. Try to match the style of the other brushes to make your brush fit in.


Next, let’s create the brush material. Right click in your new folder and choose Create -> Material and name it identically to your folder. In its inspector, click the dropdown box that says ‘Shader’ and choose any of the shaders in the ‘Brush’ submenu. There are lots of them!
There’s heaps of opportunity for experimentation here. The ‘normal’ brush shaders are the various Diffuse, Standard and FlatLit shaders. Just so that we don’t get tripped up by weird shader shenanigans, let’s just choose ‘StandardDoubleSided’.
Come back here to experiment later!

To make your brush actually have the check pattern, we’ll need a check texture! Download or create a nice, high-resolution check texture (1024x1024 is a good balance of quality and performance). It doesn’t have to be named anything in particular, but usually in other brushes the main texture for your brush is called ‘main’ or ‘maintexture’.
If you want colors to appear normally in your brush, make sure that your main texture is entirely black-and-white — white will become whatever color you have selected as you paint, and black will be transparent. Shades of grey will be semitransparent!
To make transparency work, select your texture in Unity and choose “Alpha Source” to be “From Gray Scale” and check the box that says “Alpha Is Transparency”, then click ‘Apply’ on the bottom right of the inspector.
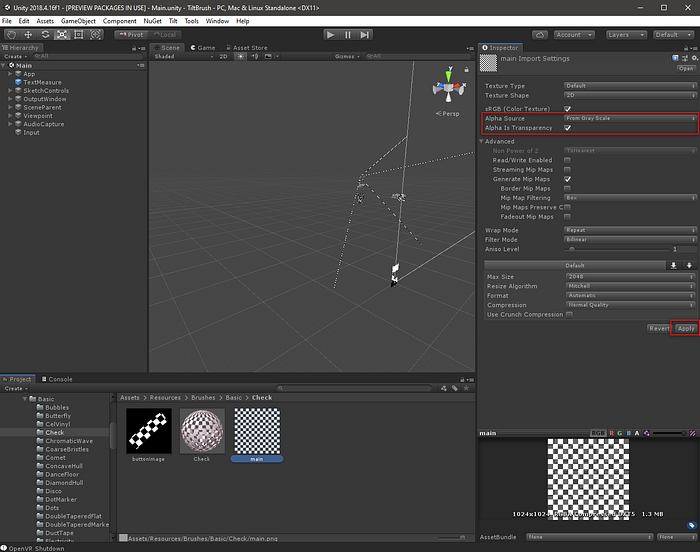

Assign this texture to the ‘Base (RGB) TransGloss (A)’ texture slot on your material. You should be able to see a preview of what the material will end up looking like. Note that if you don’t want your material to be transparent and you actually want black and white checks on the surface, then you can just leave Alpha Source to ‘Input Texture Alpha’.
Now it’s time to create the brush descriptor. There are two ways to create one. If you’d like to start from another brush as a template (which I recommend), you can duplicate it. I’m going to choose ‘Flat’. Select the brush descriptor of your ‘template’ brush, and in its inspector click ‘Duplicate Brush’. This will create a new brush descriptor that you can move into your brush folder and rename to be named the same as your folder name.


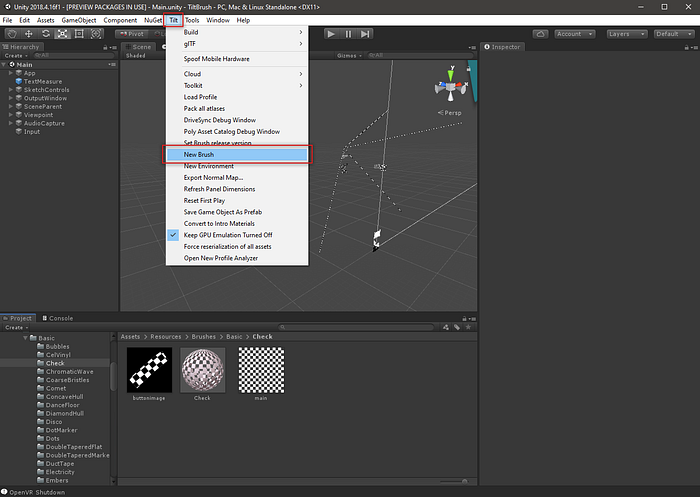
An alternative is to create a new brush from scratch. Make sure that you’re in your brush folder, and then in the top menu choose Tilt -> New Brush. This will create an empty brush descriptor that you can rename to match the name of your folder. Make sure you move the created brush manifest into your new brush folder!
One drawback to creating brushes from scratch is that many of the important values aren’t set to sensible default values. If you choose to make one from scratch, I recommend carefully looking at the various settings on other brushes if your brush doesn’t work the way you expect.
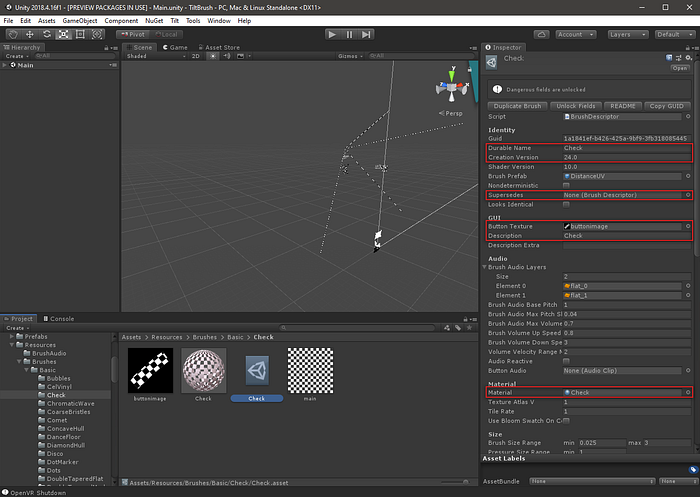
Now we need to change a few important settings to make the brush work. You may need to click ‘Unlock Fields’ before some of these options are available.
- Set Durable Name to be equal to your brush’s folder name
- Set Creation Version to be equal to the current Tilt Brush version — 24.0 right now (the community may release newer versions in the future)
- Ensure Supersedes is “None” — if it isn’t (as is the case for the Flat brush), left click on the supersedes box and press the delete key.
- Drag your buttonimage.png file into the Button Texture box
- Set Description to be your brush name — this time with spaces if you have more than one word
- Drag your material into the Material box
There’s one more very important setting here — the Brush Prefab. These basically define what geometry your brush has. This is another very juicy place to experiment! Try all of them! The brush prefabs can be found in the Assets/Resources/BrushPrefabs folder.
The most important ones you should know about are:
- Line — creates a flat ribbon with the texture stretched along the whole stroke
- Geom/FlatDistance — creates a flat ribbon with the texture tiled along the length of the stroke by distance
- Spray — places the texture multiple times at random rotations along the stroke
- TubeStretchUV — creates a 3D tube with the texture stretched along the length of the whole stroke
- TubeDistanceUV — creates a 3D tube with the texture tiled along the length of the stroke by distance
Now it’s time to actually integrate our brush into the application!
In the main Assets folder, there is a file called ‘Maniest’. Select this file, and in its inspector, scroll down to the bottom of the ‘Brushes’ list. Click the small plus-sign, and select your brush, which should be in the “Not X” folder.
If you like, feel free to drag it with the two horizontal lines to the left of its name up and down in this list to change where it appears in the brushes menu. The first number to its left is which page it’s on, and the second number is its position within that page.

Finally, if this is the first custom brush you’ve added, you need to tell Tilt Brush how to get the button image correctly. In the main scene’s hierarchy, find the object called “SketchControls”. In its inspector, uncheck the box that reads “Atlas Icon Textures”.

That’s it! If you press Play now, you should be able to find your newly created brush in the brushes menu! Now it’s time to start messing around with different Brush Prefabs, shaders and textures! If you know how to write shaders, you can use your own custom shaders! If you know C#, you can create your own custom brush prefabs!

To share your newly created brush, right click on the brush folder you created and select ‘Export Package’ and save the file wherever you like. In the window that pops up, make sure you uncheck “Include Dependencies”!
This creates a .unitypackage file that somebody else can then import into their project and get your brush! They’ll still need to add it to the Manifest file and ensure that Atlas Icon Textures is turned off, but this makes it much easier to share your creations with the world!

So go forth, create, and share what you make with the community!
The next tutorial in this series will be on how to create custom Tools, which will be quite a bit more code-heavy. As I learn more about how Tilt Brush works, I’ll create more tutorials, so keep an eye out! I’ll be posting about them from my twitter @LachlanSleight.